


What you'll need:
 Felt: I used three different colors
(back and front, lining, and decorative strip)
Embroidery Floss
Scissors
Craft glue
Pins
Needle
Measuring tape or ruler
Cardstock template (optional)
Ribbon (optional; as a decoration instead of felt)
Step 1
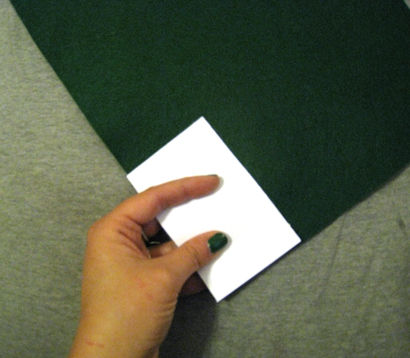 Most business cards are 2"x3.5", but you need to have a little
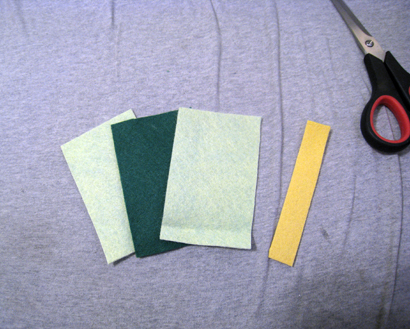
extra space for seams and so they slide in easily. Cut your template to 2.5"x 4". Use your template to cut three pieces of felt, two of your outside color and one of the lining color. Cut your decorative strip (felt or ribbon) to a length of 5", in whatever width you want. It should look like this:
Step 2
Using your template as a guide, cut a small triangular notch out of the middle of your front piece.
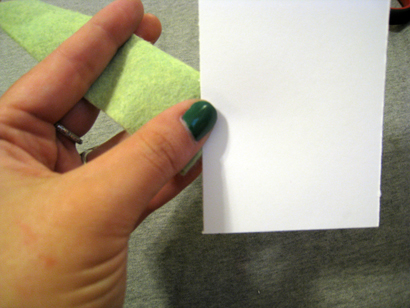 It should look like this:
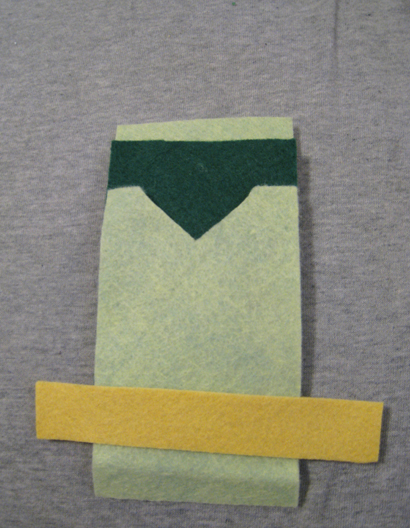
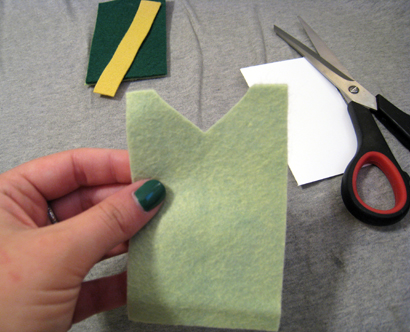 Your pieces will go in this order- back piece, lining, front piece, strip.
It should look like this:
Step 3
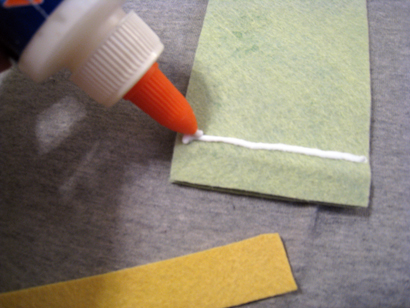
Glue your felt strip or ribbon onto the front piece only.
Glue your felt strip or ribbon onto the front piece only.
Step 4
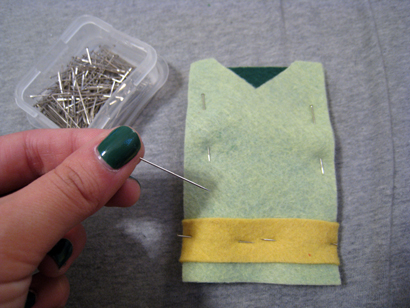
Line up your pieces. Stick the ends of the felt strip or ribbon
between the back piece and the lining piece.
Line up your pieces. Stick the ends of the felt strip or ribbon
between the back piece and the lining piece.
 Pin the layers together, making sure to line everything
up straight! It should look like this:
Step 5
Thread your needle with a wingspan's worth of embroidery floss and knot the end. You will be blanket stitching your pieces together. Here are two great tutorials for the blanket stitch:
http://stitchschool.blogspot.com/2009/12/blanket-stitch.html
http://www.futuregirl.com/craft_blog/2007/09/tutorial-hand-sew-felt.aspx
Start at the top right corner (to the right of the triangular notch when you look at the front). Hide your knot between the back piece and lining piece. It should look like this:
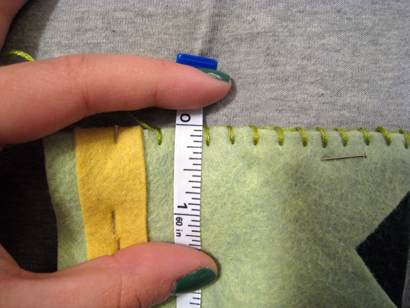
 Begin blanket stitching around clockwise until you reach the top left corner.
 Keep your stitches about 1/4" in length, and be sure to make them even on both sides!
Once you've sewn around the three sides (omitting the opening!), you're done! Remove your pins and enjoy!

Let me know if you try this out, I'd love to see the results! I hope you guys like this tutorial, I want to make this a regular thing, what do you think?


Super cute! I think I shall try it! I don't know when but hopefully soon!
ReplyDeletegreat idea! i like this.
ReplyDeletei think you should make this a regular thing; it's fun!
I love your blog!
ReplyDeleteThanks everybody!!
ReplyDeleteThese are really cute! And super simple too -thanks for sharing (and I love your felt!) :)
ReplyDeleteI think i shall try it for plastic business cards.thanks you share it.
ReplyDelete