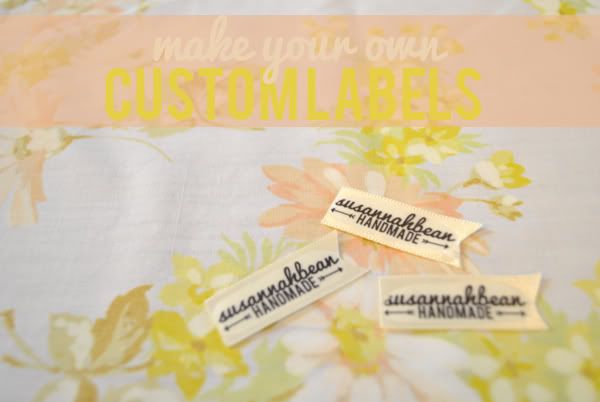
I've been thinking about adding custom labels to the headbands in my shop for a while now, and I've spent a lot of time looking on Etsy for the perfect ones. It seemed pretty expensive to get labels made for me, plus I wasn't sure I could get exactly what I wanted from someone else. So, I did what any crafty gal would do, I made my own! All you need is some light colored ribbon, iron on transfer paper, and a few household items! Here's how I did it...
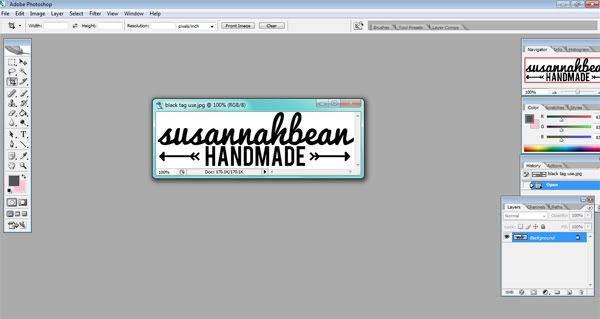
Start off by making the logo or image you want to print on your tags in Photoshop or a similar program. If you don't have Photoshop, you can use a Word document (or something similar) to design your image. Make the image a size that'll work with the ribbon you're using. My ribbon is 5/8" wide, so I made my image 1/2" tall by 1.5" wide. Use a higher resolution to make this image, if it's too low it'll look blurry when you print out your tags. I set mine at 300dpi.
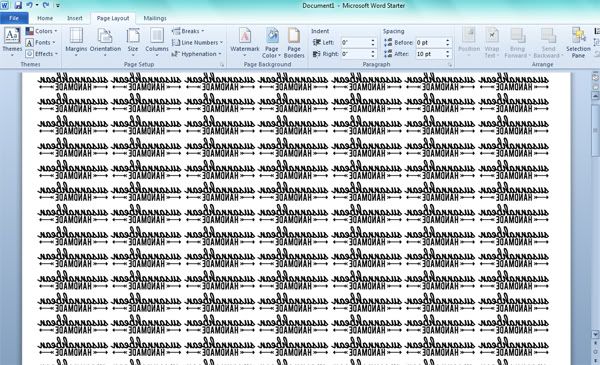
(You can make this part in Photoshop if you want, but I found it was easier in Word.) Open your tag image in Word or a similar program. You need to reverse the image so that it appears backwards, and then copy and paste it enough times to fill your page. Feel free to change your margins to fit the most images possible. Make sure there's enough room between each tag for you to cut safely, I had to add a space in between so that I would be able to cut around each image easily.
Make sure you're happy with how your tags look! I had to resize mine a teeny bit to get the page filled completely, but only down to .42". When you're comfortable, print out your tag sheet on your iron on transfer paper. Leave it to dry and get started on the next part!
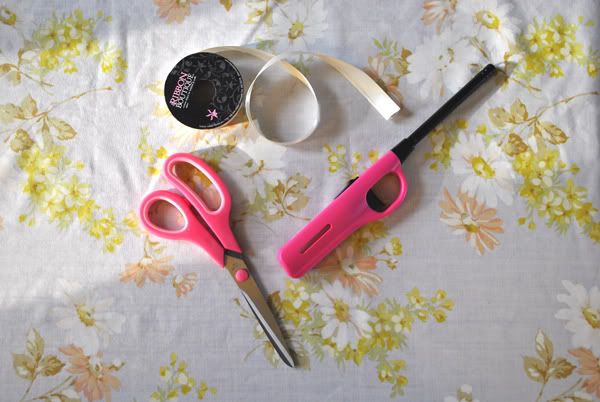
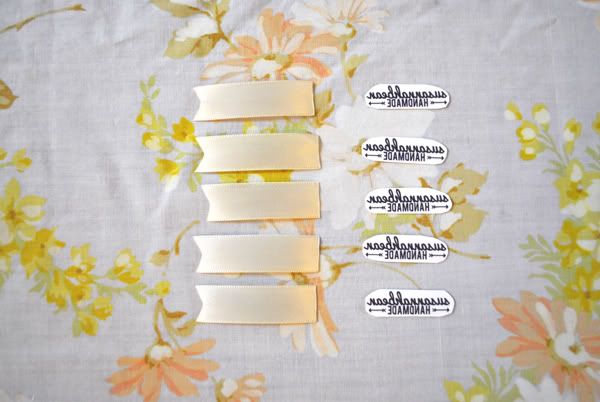
Cut your ribbon into 1.75" lengths (I cut these ones a little too long, but you can always trim them later!). I chose to cut one end by folding it in half and cutting a little wedge out. You'll have to seal the edges of your ribbon with a lighter so it doesn't fray. Carefully hold your ribbon near the blue part of the flame for a fraction of a second, it takes a little practice to get it right, so be patient!
Next, cut out your tags from the sheet you printed. You should round the corners to prevent the transfer from peeling off the tags once you've ironed it.
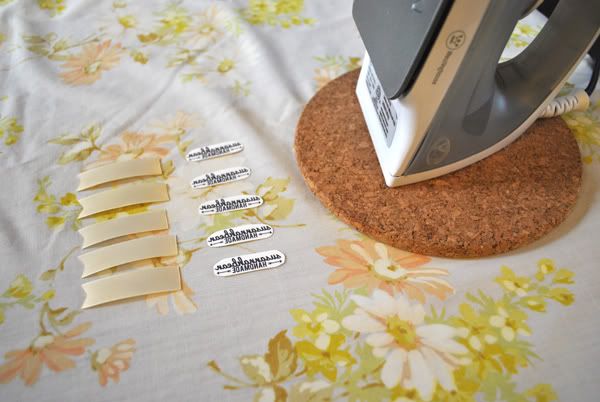
Iron your images onto your ribbon following the directions that came with your paper pack. I chose to iron my images onto the back of the ribbon because it's a little less shiny.
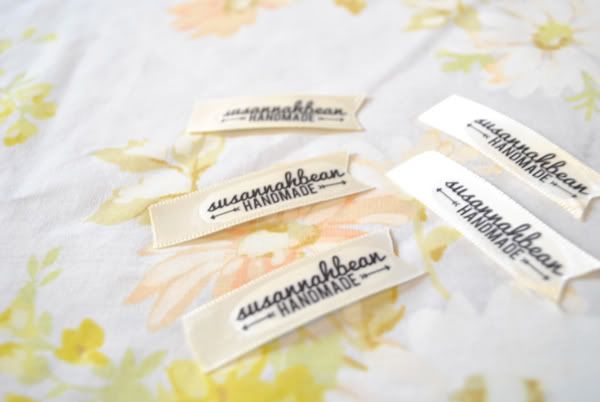
Peel off the paper backing from the ribbon. I trimmed the end of my tags and sealed the ends because they were a little too long for my liking. And that's that! There's tons of possibilities for your tags, you could do them as a loop and sew them into seams, or print them on different scraps of vintage fabric for a kitschy feel. If you make your own, I'd love to see!


This is GENIUS!
ReplyDeleteThanks for sharing! The prices some companies charge is shocking!
Ayeisha
x
Right?! Crazy prices. I spent $10 and could get at least 200 (I didn't count, but I *know* it's a better value!) xo
DeleteThese look great, thanks! XO.
ReplyDeleteThank you!! xo
Deletethey look so good! And professional! Nice job, pal!
ReplyDeleteThanks love! I figured I should get my act together :)
Deletethis is an amazing idea! i've been looking for cute packaging ideas for the new cd... thank you for inspiring me :)
ReplyDeleteOoh that could be cuuuute!! Yay, glad you liked it! Ps- email coming SOON!
DeleteSo so so fab! LOVE this!!
ReplyDeleteHappy Friday!!
xo
I'm glad you like it!! Thanks :)
Deleteso cute, so cute. I've done something similar before but this is way better!
ReplyDeletegrace
http://herumbrella.com
Thank you! xo
DeleteAw man! I wish I would have thought of this before I had a bunch made from Etsy!!
ReplyDeleteI like yours way better!
Genius! Yet so simple! Thanks so much for sharing :)
ReplyDeletexo
http://kittysnooks.blogspot.ca/
GAH! That is such a great idea ^.^ I'm going to show my roommate & we will definitely do this for our shop! Thanks.
ReplyDeleteThese are really nice labels, printed well and designed well.
ReplyDeleteThese are so cute and they printed out well! This is one of the first custom label tutorials I have seen that I actually like. Thanks!
ReplyDeleteyour work is awesome i like your effort keep it up..doing well i would like to appreciate your designs.you have to need some kind of attention on your work.Custom stickers printing is an affordable and easy way to get nice and beautiful stickers.but do maintain your quality.and always go with quality printing press.
ReplyDeletenice work
ReplyDelete